How to add ssh keys to github on Windows 10

Introduction
To push to and pull code from a git repository authentication is required. This tutorial teaches how to add SSH keys to GitHub on Windows 10. You add the SSH keys to avoid a password prompt each time you update your codebase.
SSH provides a key pair that you use to read and write data to your account. The private key is stored only on your computer. The ssh public key is added to your GitHub account.
How to add ssh keys to github on Windows 10
Step 1: Enable SSH agent on Windows 10
Windows 10 has ssh-agent disabled by default. To enable ssh-agent on Windows 10 open a Powershell prompt as Administrator and type:
Set-Service ssh-agent -StartupType Automatic
Start-Service ssh-agent
The first command enables the ssh-agent service during the startup of Windows. The second command starts the service.


To list the existing ssh keys type:
ssh-add -l
You may want to use an existing ssh key pair.
Step 2: Create your ssh keys
To create a new ssh key on Windows 10 type:
ssh-keygen -t ed25519 -C "the_email_you_have_on_github"
Enter a location to save the file when asked. Then enter a passphrase.
Once finished you will have a private ssh key and a public one.
Step 3: Add ssh key to ssh-agent
To add the ssh key to the ssh-agent type:
ssh-add C:\Users\User/.ssh/new_id_ed25519
Make sure to enter the path of your ssh key.
Step 4: Add the public key to your Github account
To add the public ssh key to your GitHub account you need to copy the public key first. To copy the ssh public key type:
clip < C:\Users\User/.ssh/new_id_ed25519.pub
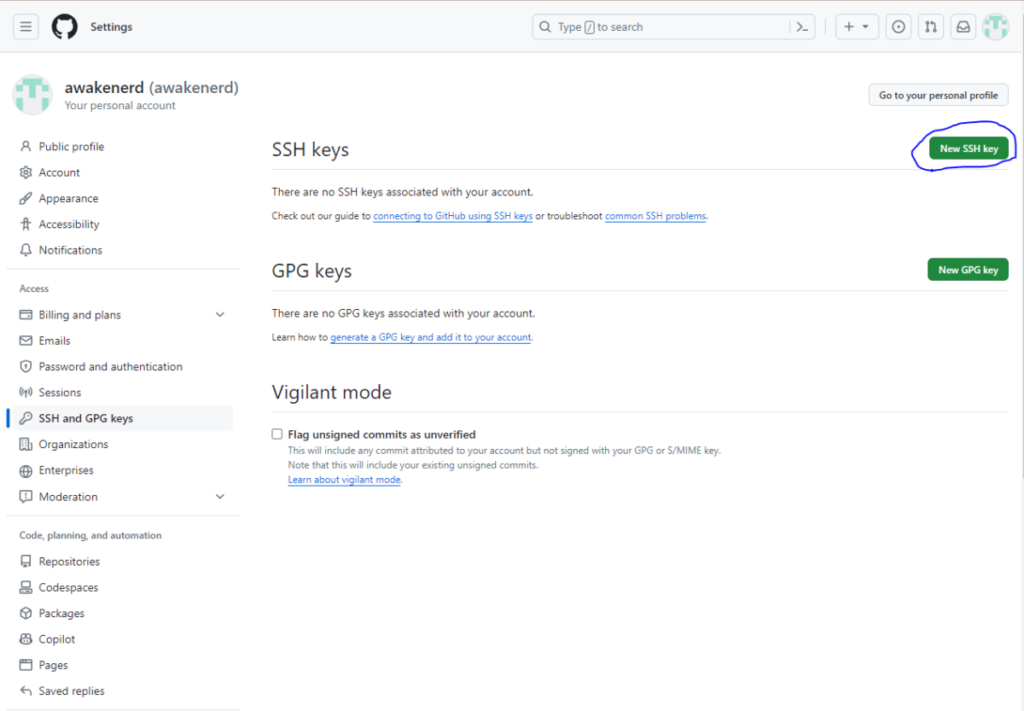
On your GitHub profile go to Settings. Click on SSH and GPG keys.
Then New SSH key and paste the public key.

Step 5: Test your ssh connection to Github
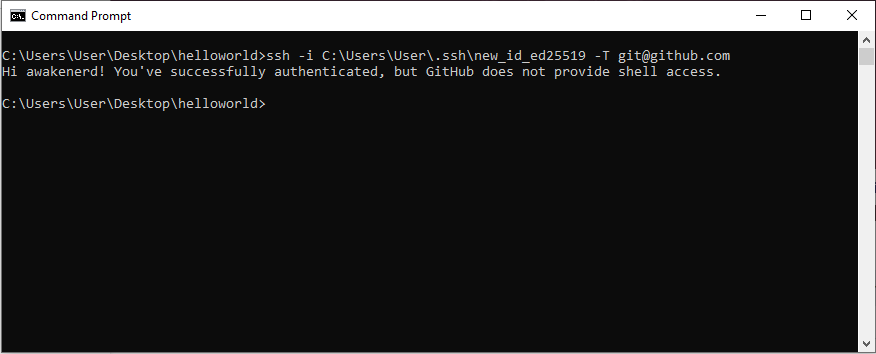
To test your ssh connection to GitHub type:
ssh -i C:\Users\User.ssh\new_id_ed25519 -T git@github.com

The -i option specifies the full path of the ssh key file.
Final thoughts
You learned how to add ssh keys to GitHub on Windows 10. Learn how to push your code to a remote repository.
