How to install Jupyter Notebook on Ubuntu 24.04 LTS (Local setup for Python beginners)
This tutorial teaches you how to install and set up Jupyter Notebook on Ubuntu 24.04 LTS. We will go through beginner-friendly steps for a local setup and by the end we will run some Python examples inside your Jupyter Notebook.
What is Jupyter Notebook
Jupyter Notebook lets you write, edit, and run code in small sections called cells directly from your web browser. As you type code inside a cell, you can execute it on its own and see the results immediately, which is very useful for learning Python step by step. As a beginner you don’t have to fear making mistakes, because each cell can be edited and rerun, so you can experiment freely. On top of that, you can save your notebook and return later to continue where you left off.
Thousands of professionals also use Jupyter Notebook daily in teaching, data science, machine learning and research projects. They choose it because it supports many programming languages, comes with a rich ecosystem of free libraries, and is both open source and free. By learning and using Jupyter Notebook now, you will build foundational skills that can help you stand out and attract job opportunities in the future.
Why use Jupyter Notebook
Here are three reasons to install and use Jupyter Notebook when starting with Python.
Jupyter Notebook mixes code with notes
A key reason to use Jupyter Notebook as a beginner is its ability to combine notes, images and formulas with pure code. You can write explanations in Markdown alongside your code, add inline images, or include math formulas. This makes learning Python easier because you can mix practice with your own notes in the same place. You can think of it as a digital notebook, but with the power to run code right next to your visual explanations.
Beginner-friendly coding interface
Jupyter Notebook’s intuitive interface makes the process of coding straightforward and easy, especially for beginners. Once installed, you simply open its URL in your browser and start typing code inside a cell. Due to its interactive nature running a cell is as simple as clicking on the Play button which we will explore later with Python examples.
Sharing and reproducing made easy
You can save your whole notes, code, and outputs in a Jupyter Notebook, which you can share with others for collaboration or review. Others can easily reproduce your work by running your .ipynb files — that is, your Jupyter Notebooks. As a beginner, you can also track your progress over time, and return to your saved notebooks to edit and rerun code whenever you want.
Now that you learned what Jupyter Notebook is and why it’s useful, take a look at the prerequisites to see if your system meets them.
Prerequisites
Before installing Jupyter Notebook on Ubuntu 24.04 LTS make sure you have the following:
- Ubuntu 24.04 LTS installed on your computer – This tutorial is specifically for this version.
- Terminal access – You will need to run a few commands.
- Python 3 – Comes pre-installed with Ubuntu 24.04 LTS.
Install Jupyter Notebook on Ubuntu 24.04 LTS
Follow the steps below to install and set up Jupyter Notebook on Ubuntu 24.04 LTS.
Step 1: Update Ubuntu 24.04 LTS
An Ubuntu update guarantees you have the latest stable version of each package. To update Ubuntu 24.04 LTS open a terminal (Ctrl + Alt + T) and type:
sudo apt update && sudo apt upgrade
The first command updates the list of available packages, while the second upgrades them to their latest stable versions.
Step 2: Create a virtual environment for Jupyter Notebook
We will install Jupyter Notebook inside a virtual environment. This keeps the system clean and avoids package conflicts.
To create a virtual environment type:
python3 -m venv jupyter_notebook
The above command uses the venv Python package to create a virtual environment named jupyter_notebook. You can replace it with any name you like.
To work inside a virtual environment you need to activate it first. Do so by typing:
source jupyter_notebook/bin/activate
Once activated you will see the (jupyter_notebook) prompting on your terminal.

This means the virtual environment is active, and ready for you to install Jupyter Notebook inside it.
Step 3: Install Jupyter Notebook inside a virtual environment
We will use pip to install Jupyter Notebook inside your virtual environment. First, upgrade pip, since virtual environments usually start with an older version.
To upgrade pip type:
python -m pip install --upgrade pip
Now that pip is upgraded, install Jupyter Notebook on Ubuntu 24.04 LTS:
pip install notebook
Check the version of your Jupyter Notebook:
jupyter notebook --version

Step 4: Launch Jupyter Notebook on Ubuntu 24.04 LTS
Now that you installed Jupyter Notebook inside the virtual environment, launch it:
jupyter notebook

Jupyter Notebook will automatically open in your browser. If it doesn’t, check the terminal for a URL as shown below.

Copy one of the URLs, including the token, and paste it in a new browser tab to access the Jupyter Notebook.
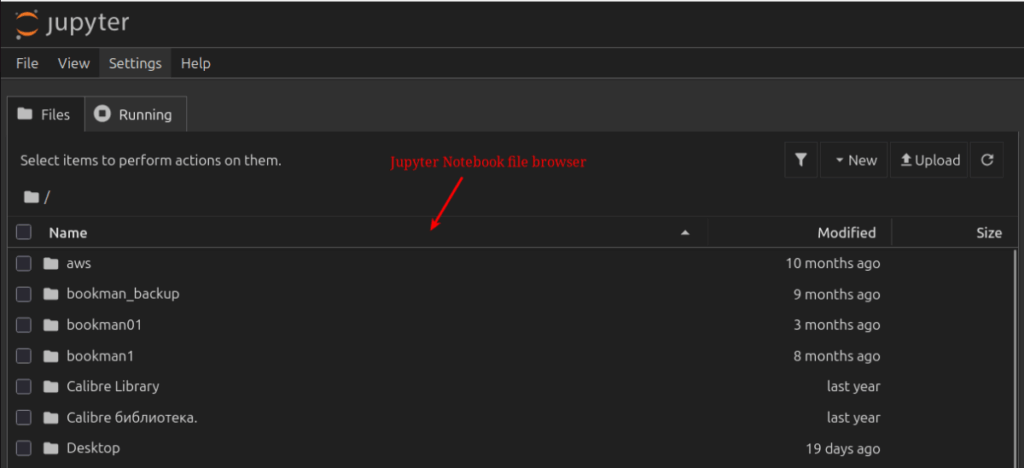
The screen that pops up is the Jupyter Notebook’s dashboard. It’s a file browser that shows the current working directory. From here, you can open existing notebooks or create new ones.
Note: Step 5, 6 and 7 are created for users who want more control over their Jupyter Notebook setup — such as running on a custom port, setting a password and exposing it to the local network. Although you can skip them, I recommend completing these steps for a more flexible, secure and feature-rich setup.
If you prefer, you can jump straight to Step 8 where I will teach you how to create a new Jupyter Notebook, followed by Step 9 to start coding Python.
Important: Before continuing with Step 5,6, or 7 make sure to shut down any Jupyter Instance you started previously.
To do this, go to the terminal where your current Jupyter Notebook session is running and press:
Ctrl + C
When prompted, type y and press Enter to confirm the shutdown.
Step 5: Run Jupyter Notebook on a custom port
Jupyter Notebook runs on port 8888 by default. Sometimes this port may be in use, most commonly because of you leaving another Jupyter session running.
To avoid port conflicts, run Jupyter Notebook on a custom port:
jupyter notebook --port=1331

The --port options specifies a custom port. I recommend to pick a number between 1024 and 49151, which are generally good for personal use.
Step 6: Set a password for your Jupyter Notebook
Others on your local network can access your Jupyter Notebook by providing either a token or a password. Although both are good security mechanisms, the token is not very practical as the string is very long. A password is much easier to manage and share.
Set a password for your Jupyter Notebook:
jupyter notebook password

Now, when someone tries to access your Jupyter Notebook on your local network through the URL, they will be prompted to enter the password you set up above.
Step 7: Expose Jupyter Notebook on your local network
Your Jupyter Notebook can also be accessed from other devices on your local network. For example, you can write code on your computer, and review your notebooks from your smartphone or tablet.
Expose your Jupyter Notebook on your local network:
jupyter notebook --ip=0.0.0.0 --port=1331
The --ip option tells Jupyter Notebook what IP address to listen on. Using 0.0.0.0 makes it available on all IPs of your computer.

Now that you exposed your Jupyter Notebook on your local network you can access it from another device through its IP address. Find the IP address of your computer on Ubuntu:
hostname -I

From your other device on the same network open in browser:
http://192.168.100.2:1331

Type the password you set up in Step 6 and Log in.
Step 8: Create a new notebook in Jupyter Notebook
A Jupyter Notebook keeps your code organized and automatically saves your work. In this step you will learn how to create a new notebook to start writing Python.
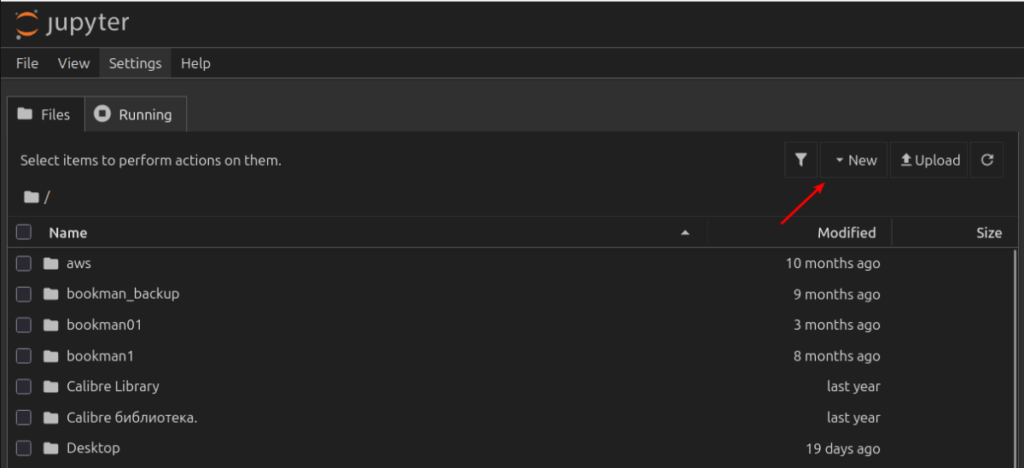
Once you are in the Jupyter Dashboard you saw during Step 4, click on New as below.
Then select Python 3 (ipykernel).
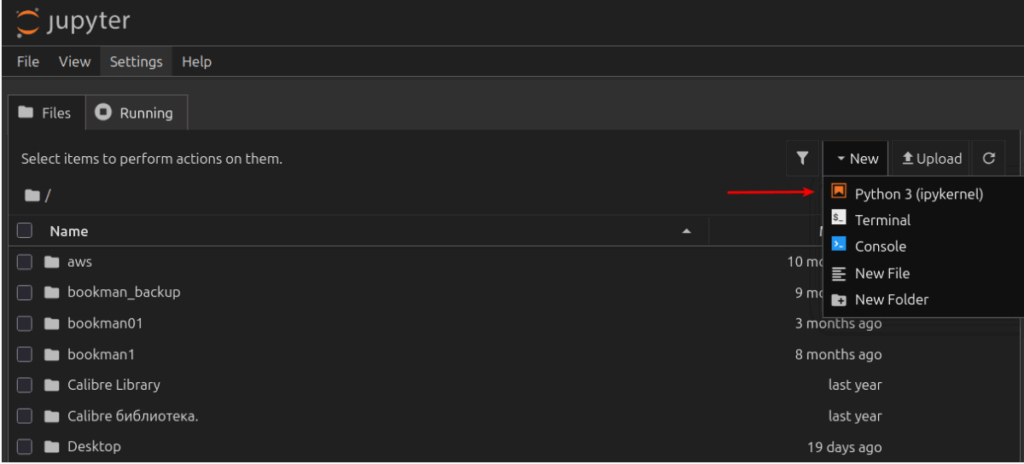
Once you click on Python 3 (ipykernel) shown above, a new interactive Jupyter Notebook opens.
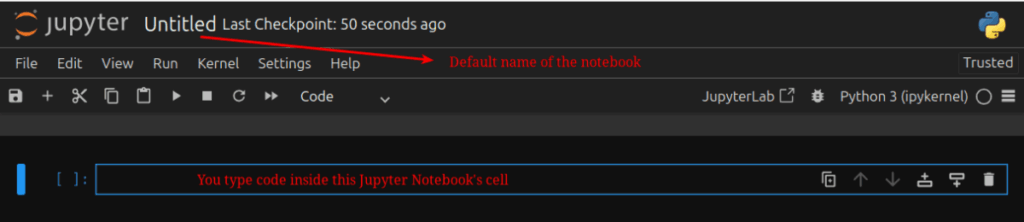
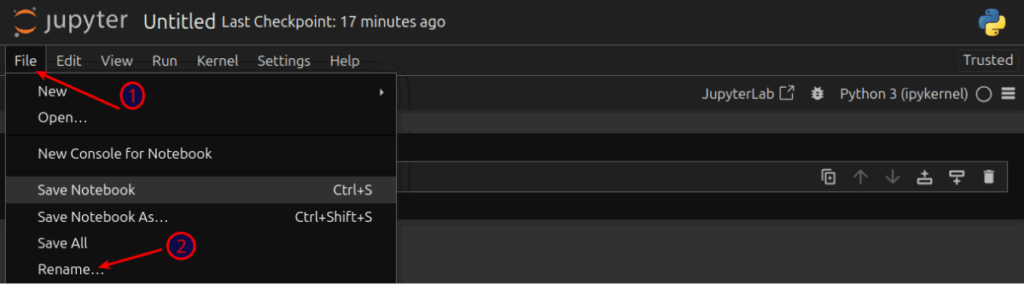
It’s a good practice to save your new Jupyter Notebook under a name since by default it’s named as Untitled.ipynb. To do so click on File as below and later on Rename…
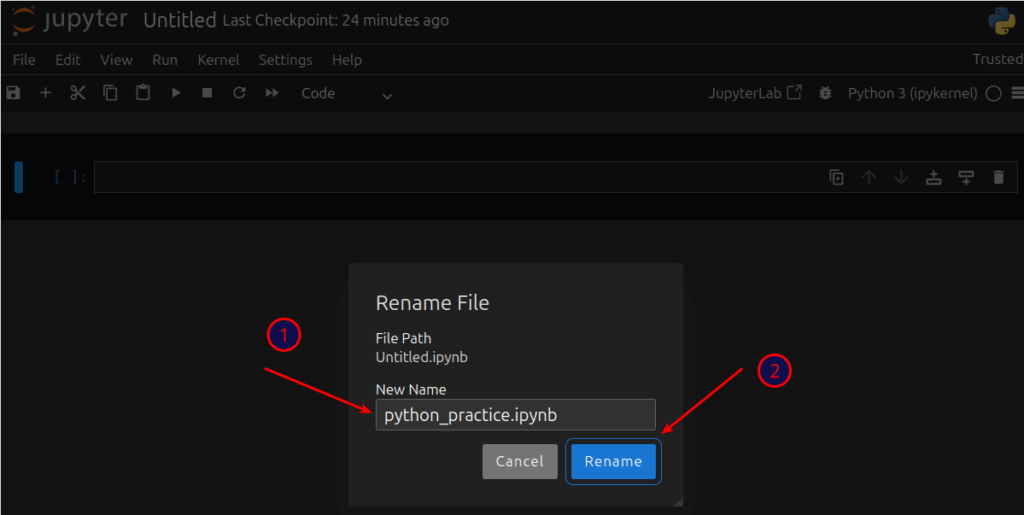
A name box prompts up. Choose a name for your Jupyter Notebook and click on Rename.
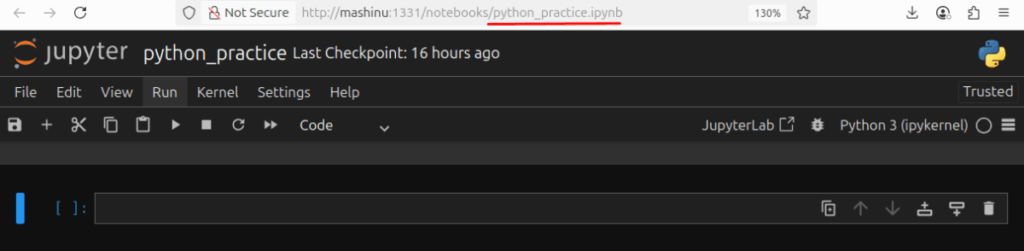
The new name for your Jupyter Notebook will be reflected in the URL.
Step 9: Run Python code in Jupyter Notebook
Now that we have Jupyter Notebook running we will explore a few Python examples. This will help you get familiar with the Jupyter Notebook’s interface and prepare you for tutorials to come.
The print() statement in Python
Let’s write a simple Python print() statement to display a message. In the first cell of your Jupyter Notebook, type:
print("This is my first Jupyter Notebook")

Click on the Play button or press Shift + Enter on your keyboard to run the cell.
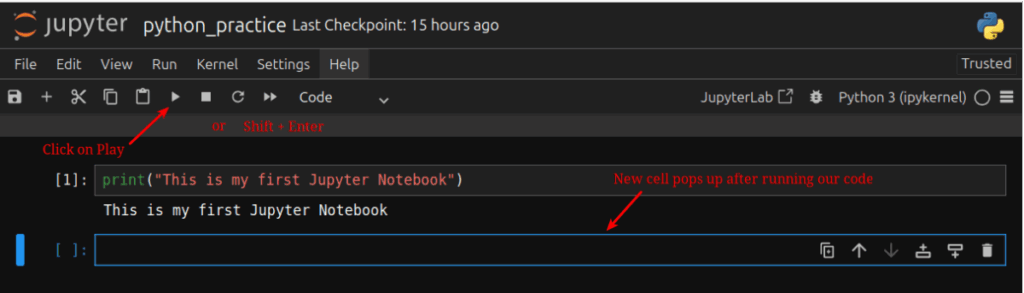
When you run a cell, Jupyter Notebook automatically adds a new one below it. It’s possible to avoid it by using Ctrl + Enter instead of Shift + Enter.
Write comments in Python
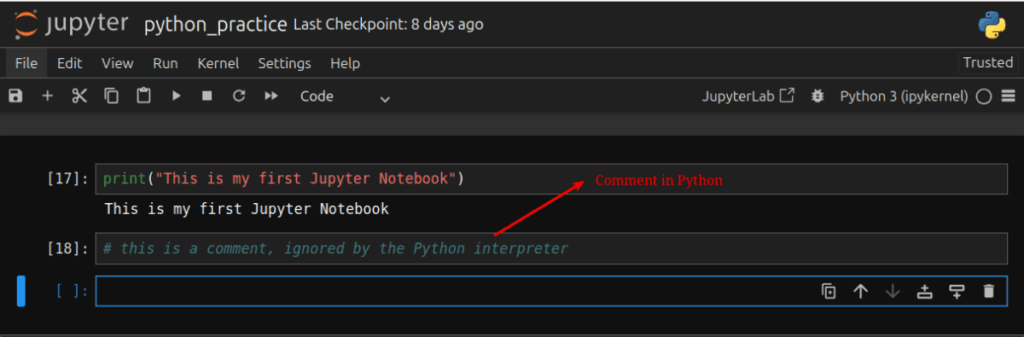
Use the # symbol to write comments in Python. Comments in programming help to explain what your code does.
# this is a comment, ignored by the Python interpreter
Assign values to variables in Python
Variables let you store and reuse data in your code without repeating yourself. You type them on the left and assign them values on the right side of the equal sign.
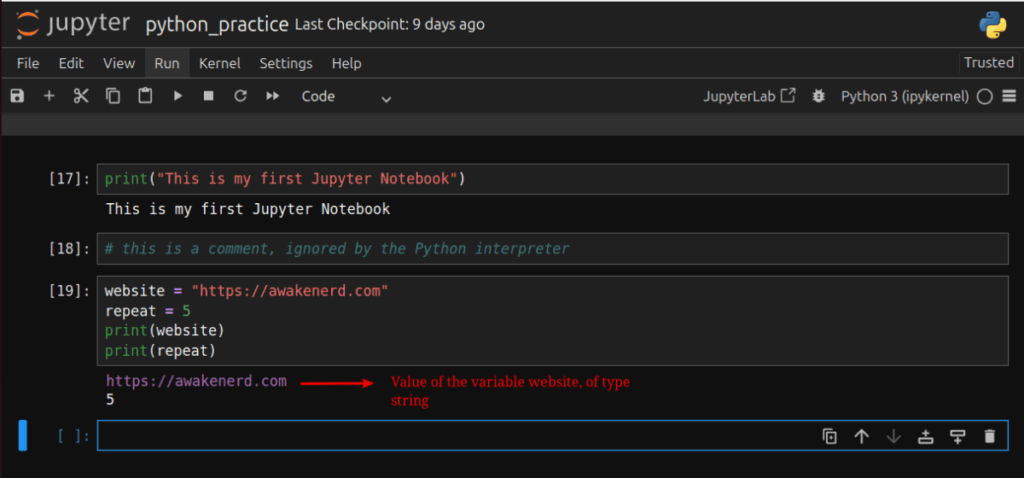
Let’s store some values inside variables and use the print() statement to display their values on our Jupyter Notebook.
website = "https://awakenerd.com"
repeat = 5
print(website)
print(repeat)
Math operations in Python
You can use Python as a calculator. Now let’s perform some basic math operations in your Jupyter Notebook.
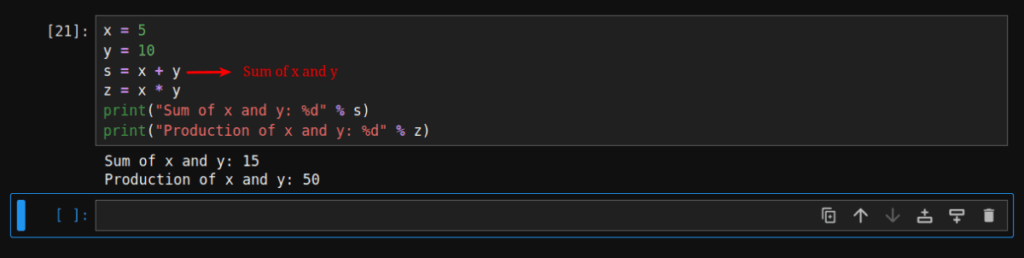
x = 5
y = 10
s = x + y
z = x * y
print("Sum of x and y: %d" % s)
print("Production of x and y: %d" % z)
Loops in Python
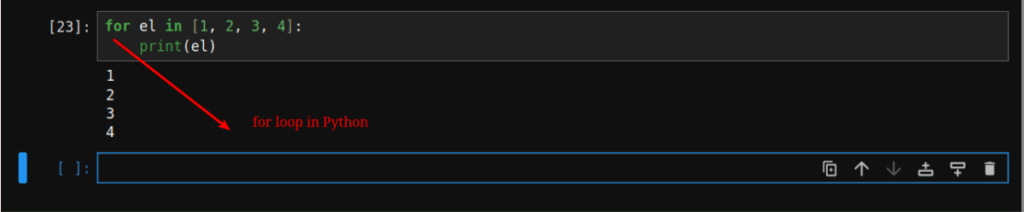
Loops help to repeat actions. For example you may want to print every element of a Python list.
for el in [1, 2, 3, 4]:
    print(el)
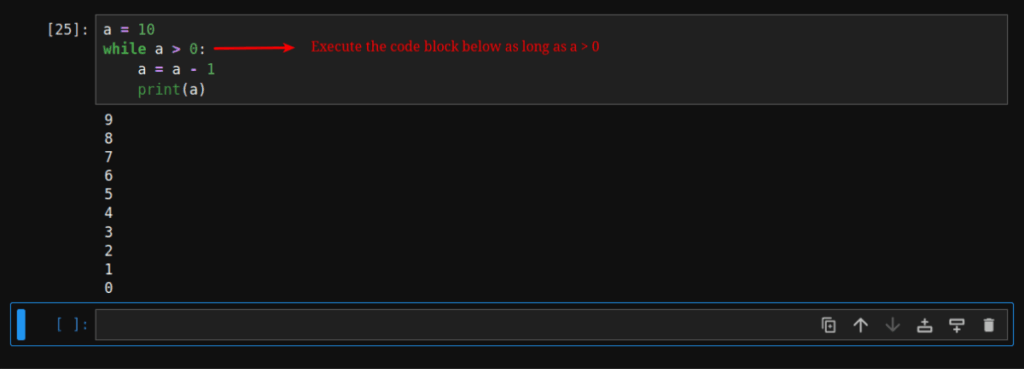
Or you may want to execute an action as long as a condition is met.
a = 10
while a >= 0:
    a = a - 1
    print(a)
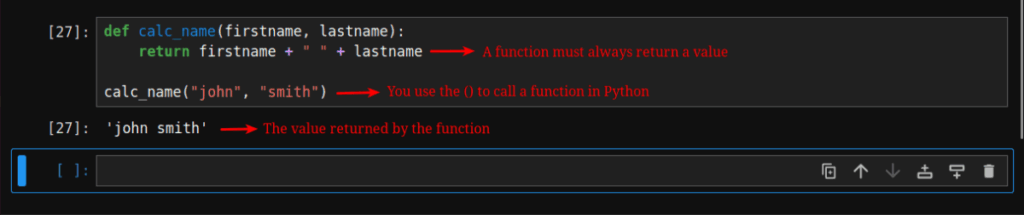
Functions in Python
Functions help you package and reuse Python code. To Declare a function in Python use the def statement as below.
def calc_name(firstname, lastname):
    return firstname + " " + lastname
To execute the function call it as below:
calc_name("john", "smith")
Import libraries in Python
Python is shipped with batteries included. This means you can choose and pick up already built-in tools directly from the Python’s standard library. To include one of these tools in your working environment you use the import statement.
For example we can import the math library.
import math
You can also assign an alias to the library you import. This is useful when the name of the library is too long.
import urllib.request as req
Plotting points with Matplotlib
Matplotlib is a Python library that helps you to visualize your data into line charts, bar graphs, histograms and more.
Let’s import Matplotlib to plot data points.
import matplotlib.pyplot as plt
In the next cell define the coordinates for your points as an array, set the size of the figure, and also label the axis.
x = [1, 2, 3, 4, 5]
y = [10, 20, 25, 30, 40]
plt.figure(figsize=(4, 2))
plt.title("Basic Line Plot")
plt.xlabel("X Axis")
plt.ylabel("Y Axis")
Run the plot() function to plot the data points.
plt.plot()
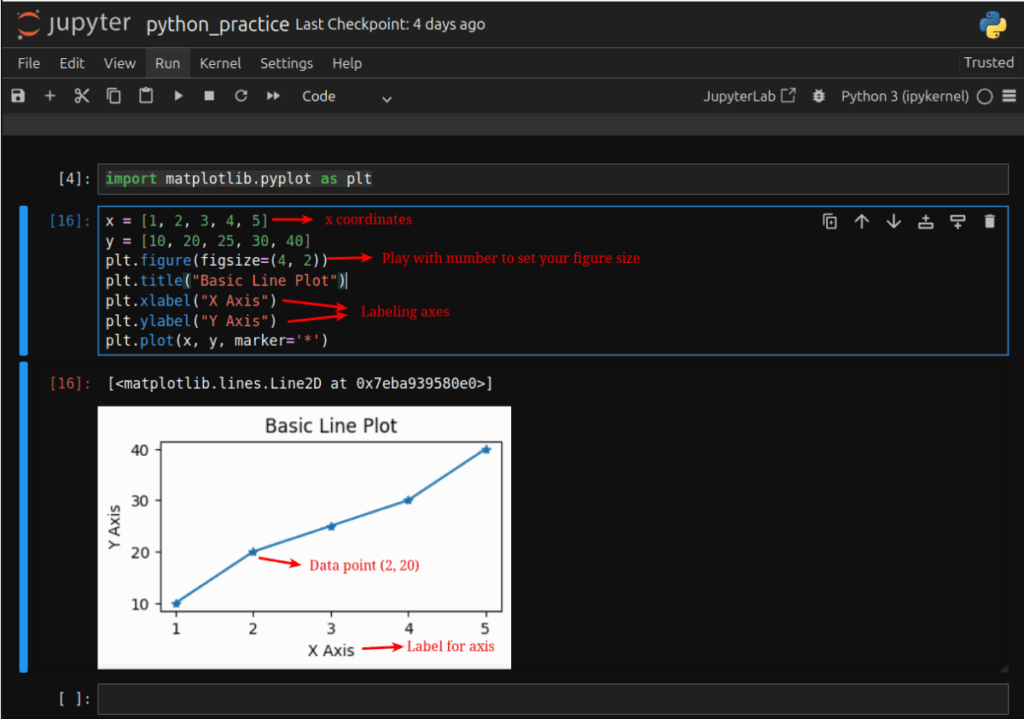
As you can see in the image above, we drew a line chart that connects the points (1, 10), (2, 20), (3, 25), (4, 30), (5, 40).
Final thoughts
Through this tutorial, you learned how to install Jupyter Notebook on Ubuntu 24.04 LTS. You also went further by running Jupyter Notebook on a custom port within your local network and securing it with a password.
In the end, you executed Python examples in your Jupyter Notebook to prepare for the next tutorial. In the next piece, we will learn how to monitor system processes with Python inside Jupyter Notebook.